Kousou Games
Photoshop Tutorial 2
Home
News
About
Staff
Games
Sprites
Examples
Backgrounds
Articles
Sounds
Music
Links
Archive
Search
Forum
Photoshop Tutorial #2 - Using Polar Coordinates
Firstly let's just make a nice orb-type-thing.
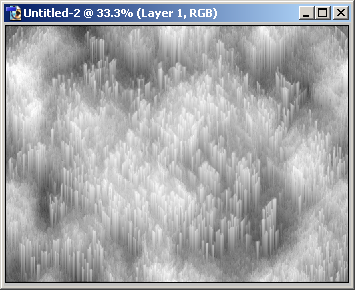
New Document, Filter > Render > Clouds.
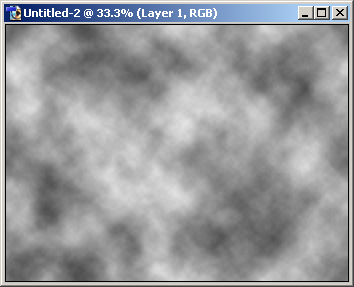
Let's add some depth, so do a little effect like crosshatch or something, and if nessasary use Brightness / Contrast to make things more clear.

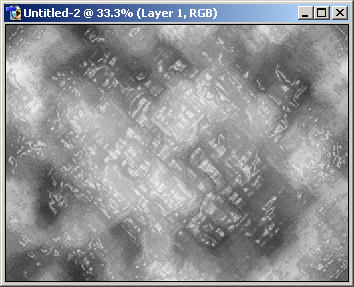
Now we want some nicely sticking out lumps, I used Filter > Artistic > Plastic Wrap with quite a bit of detail.
Rotate the canvas over 90 degrees to counter us turning it back later, unless it's square as this would be pointless.
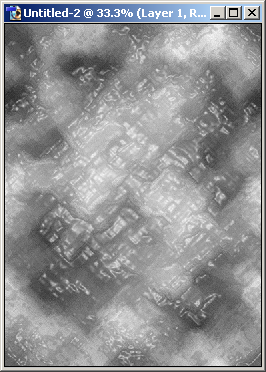
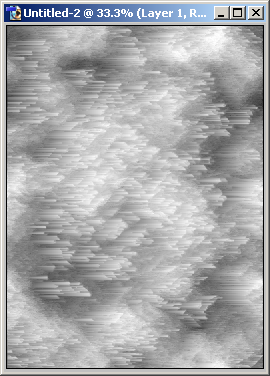
Do Filter > Stylize > Wind a few times.
Rotate the canvas back, bearing in mind that the top of the image will become the centre.
And finally the most important move of all, Filter > Distort > Polar Coordinates going rectangular to polar.
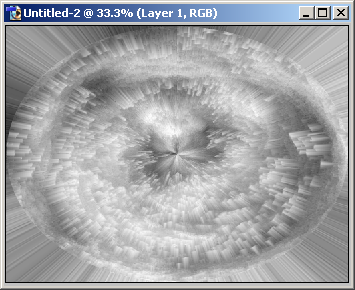
There we go. You can then add some colour, and so on. Here's mine.
Now let's use the same sort of technique on something we already made. So take an image of something... round...
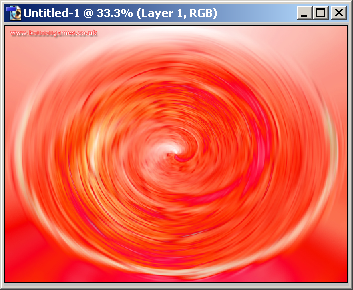
Hold down the mouse button on the Marquee tool, and select the Elliptical Marquee Tool. Make a selection in the middle, as my image was 1024 by 768, I made the circle about 600 wide. Then, press CTRL+Shift+I to invert the selection, and press delete. Deselect by pressing CTRL+D.
Apply Polar Coordinates going Polar to Rectangular, and you should have something like this:
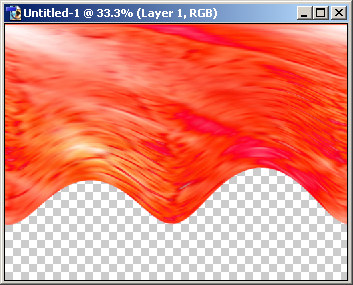
Make a new layer, put it underneath and fill with black (Shift+F5). Merge the layers by pressing CTRl+E.
Rotate the canvas, apply Wind a couple of times, and rotate back:
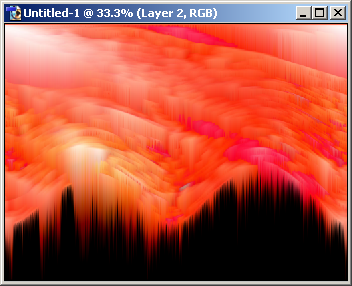
Polar Coordinates from Rectangular to Polar, and you'll have something like this:
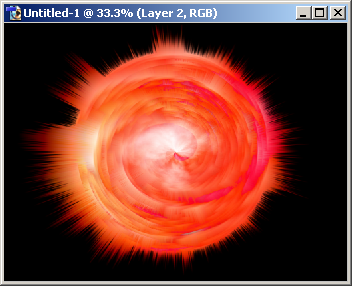
And with a little adjusting, I came up with this.
And that's all I have to show on Polar Coordinates, although there's probably much more for you to find.
© Kousou Games 2007
hifi version